Working With Security History
| Getting Started and Selecting a View | Searching and Examining Details | Quarantining Suspect Software | Restoring Quarantined Software | Submitting a File | Taking Other Actions With Alerts |
Quarantining Suspect Software
When you find suspect software, you can add it to the quarantine yourself. You provide the item's description of no more than 60 characters, so be sure to use recognizable terms because these will appear in the Security History.
Here's How
-
Open Security History and click the current view name. (Remind me how.)
-
Choose Quarantine from near the end of the list that opens.
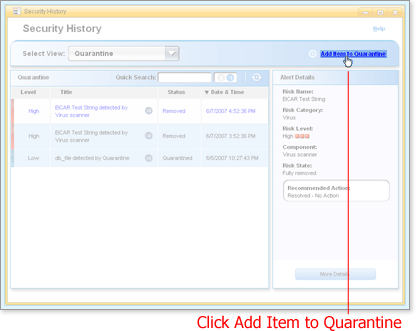
Security History refreshes with a list of quarantined items.
-
Click Add Item to Quarantine in the upper right corner of Security History.
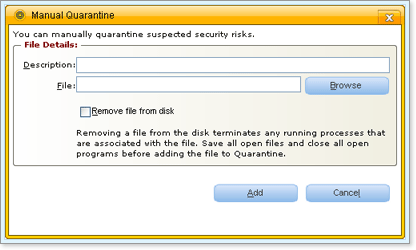
Manual Quarantine opens.
-
Type a descriptive name for the item in Description, no more than 60 characters.
-
Provide the full path in File or proceed to steps 7 and 8.
If you typed or pasted the full path, proceed to step 9.
-
Click Browse.
-
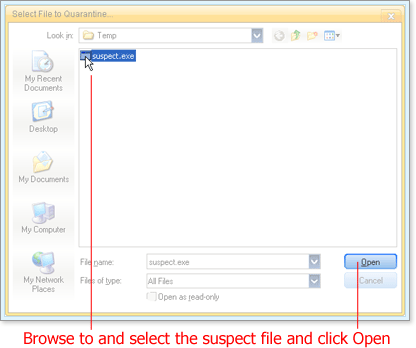
Browse to and select the item you want to add to quarantine and click Open.
-
Click Remove file from disk.
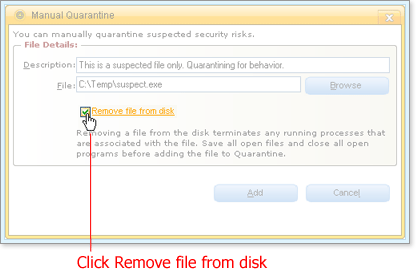
This confirms that the file is to be quarantined.
-
Click Add.
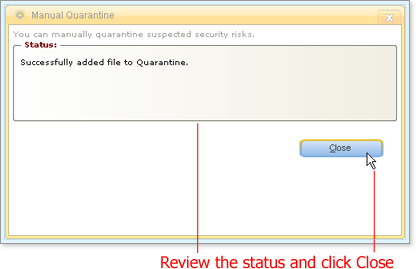
The File Details area changes to a Status area which reflects the progress of the addition—for example, Pending—and the final status—for example, successful addition of the file to Quarantine.
-
Click Close.
-
Click the Refresh button
 or press the F5 key.
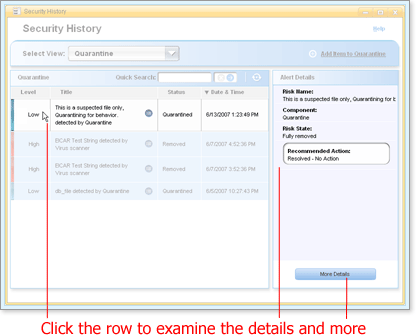
Security History refreshes the list with the current quarantine items.
-
Click the item you added to examine its details.
What's Next
If necessary, you can remove the file from quarantine—for example, if you determine that the file is not a risk and it is needed by legitimate programs.
Words to Know
- Alert: A message that appears to signal that an error has occured or that there is a task that requires immediate attention, such as a virus alert.